ArganoのWanです。 この記事では、GitHub ActionsとDigitalOcean を使ってコンテナイメージをデプロイする方法について紹介します。
Introduction
In this post, we will explore the modern way of delivering web applications through containers and automation. We will use GitHub Actions and DigitalOcean to perform a containerized deployment using Docker and Docker Hub.
We will start by setting up the environment manually to understand the core concepts. Once the foundation is solid, we will use GitHub Actions to automate the entire process, allowing you to deploy with a single git push.
About deploy
To deploy a website, you need a computer that is constantly connected to the internet. While you could use your own laptop, it isn’t practical because you need to carry it around, and the connection may drop. You might consider using a dedicated local PC, but today, we are going to discuss the most reliable method: Cloud Deployment.
What is Cloud Deployment?
The “Cloud” is essentially just someone else’s computer. However, what makes cloud providers special is they ensure their servers are always running, which is highly secure and connected to high-speed internet. This is exactly what is required to host a professional website.
You may have heard of Amazon Web Services (AWS), which is world-renowned and used by many major corporations. However, AWS is often criticized for its steep learning curve, complex permission settings (IAM), and high costs. In this guide, we will explore how to deploy your website efficiently without relying on AWS.
About container
A container is an isolated environment that allows our software to run consistently.
To create a container, prepare a container image, which is a blueprint containing everything needed to run the application—such as the source code, system libraries, and the runtime. When we run the container image on an engine like Docker, it becomes a container that behaves exactly as it did in the local development environment.
Why are we using container
It might seem complex, so why not just put the source code on a Virtual Machine (VM) and build it there?
The primary reason we use containers is to solve the infamous “It works on my machine” problem. In the past, it was common for code to work on a developer’s laptop but fail in production due to different Node.js versions, OS discrepancies, missing libraries, or forgotten environment variables like API keys. Without these exact dependencies, the app would crash.
How did container solve the problem
The container image solves this by “locking in” everything: the OS, libraries, and every dependency required for the app to function.
By storing everything in the image, we ensure the same results regardless of where the app is running. This significantly increases production stability and simplifies deployment; instead of configuring a virtual machine from scratch, we can simply pull the image from cloud storage and then deploy it, knowing it will work exactly as it did during development.
Docker Image
Docker is the software you can use to create and run the container image. Before we create the image, we need to prepare two files, the Dockerfile and the .dockerignore. The Dockerfile is like a recipe on how to create your container image, while .dockerignore specifies what not to include in your image, for example, we will usually not include node modules in our container image as we will install them during the image build process.
Once your Dockerfile and .dockerignore are ready, use Docker to create the container image locally. Then, create a Docker Hub account and push your image from your local machine to your Docker Hub.
cd your-project
docker login


# Create your container image
docker build -t your-username/my-app:latest .


# Push your container image to the docker hub (Cloud)
docker push your-username/my-app:latest
Server
We will use a Virtual Private Server (VPS) to deploy our website. A VPS provides a virtual Linux instance with a static IP address.
While many may start with “Zero-Config” platforms like Vercel, using a VPS with a container-based workflow (Docker) makes your setup provider-agnostic. This means your deployment process is portable; you can move your entire site from one provider to another without changing a single line of code.
We would use Digital Ocean as our VPS provider this time due to its simplicity. You can choose any other VPS provider if you have any preference.
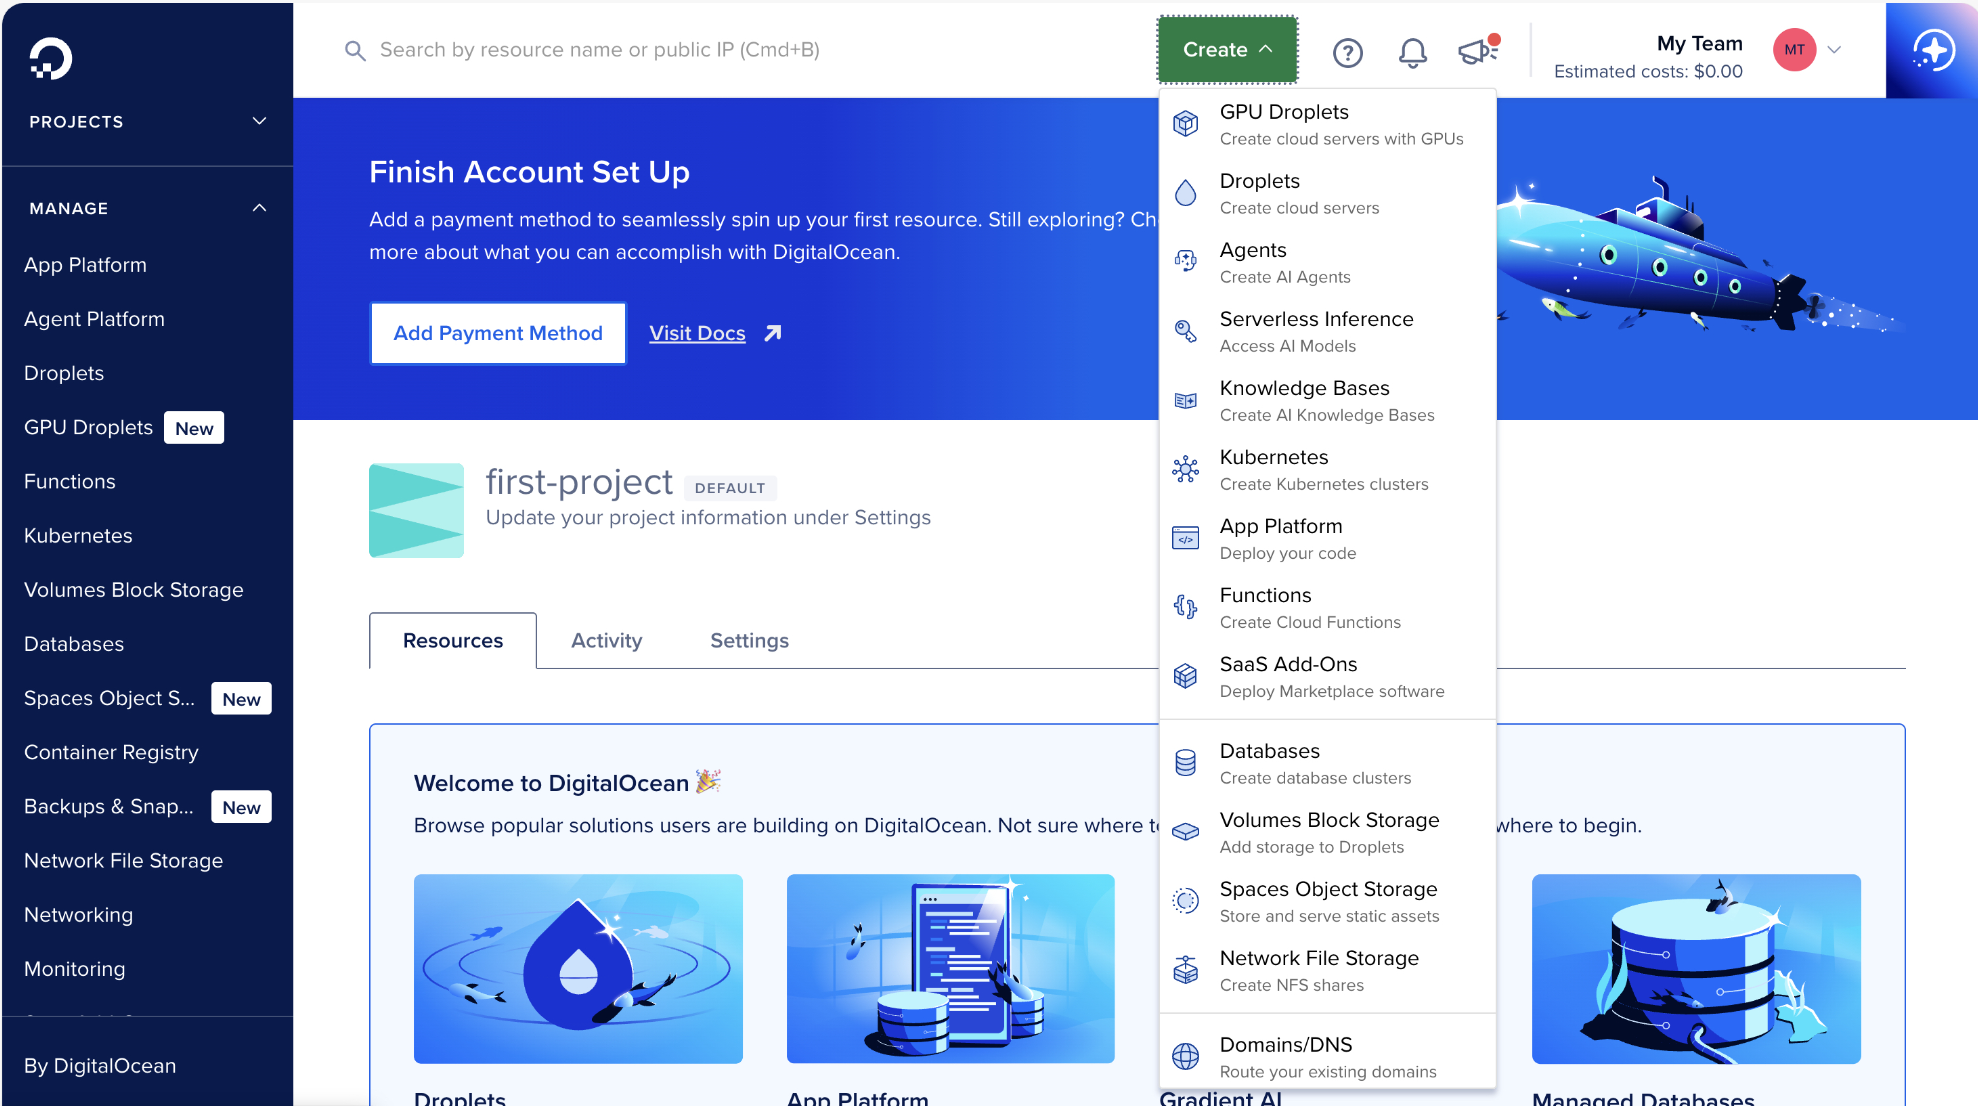
First, on the DigitalOcean home page, select “Create Droplet.” Note that “Droplet” is simply DigitalOcean’s marketing term for a VPS.
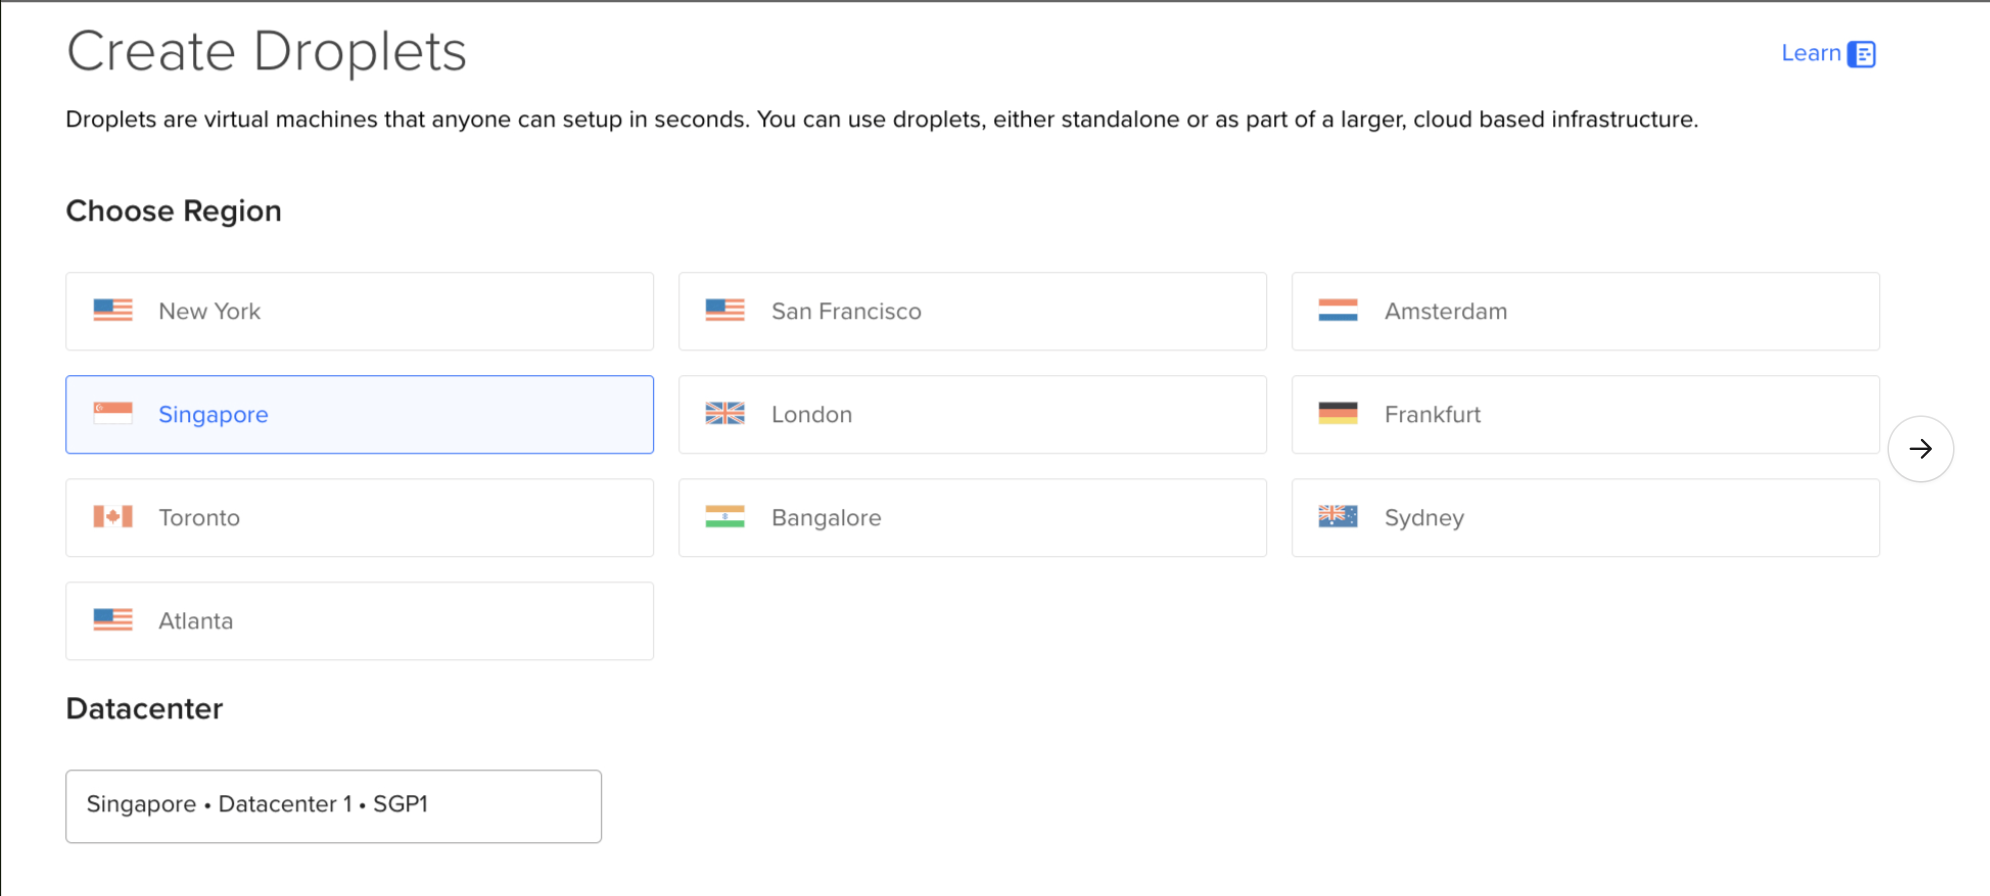
Once on the creation page, configure the Droplet to suit your use case. Choose a Data Center region closest to your target audience to minimize latency
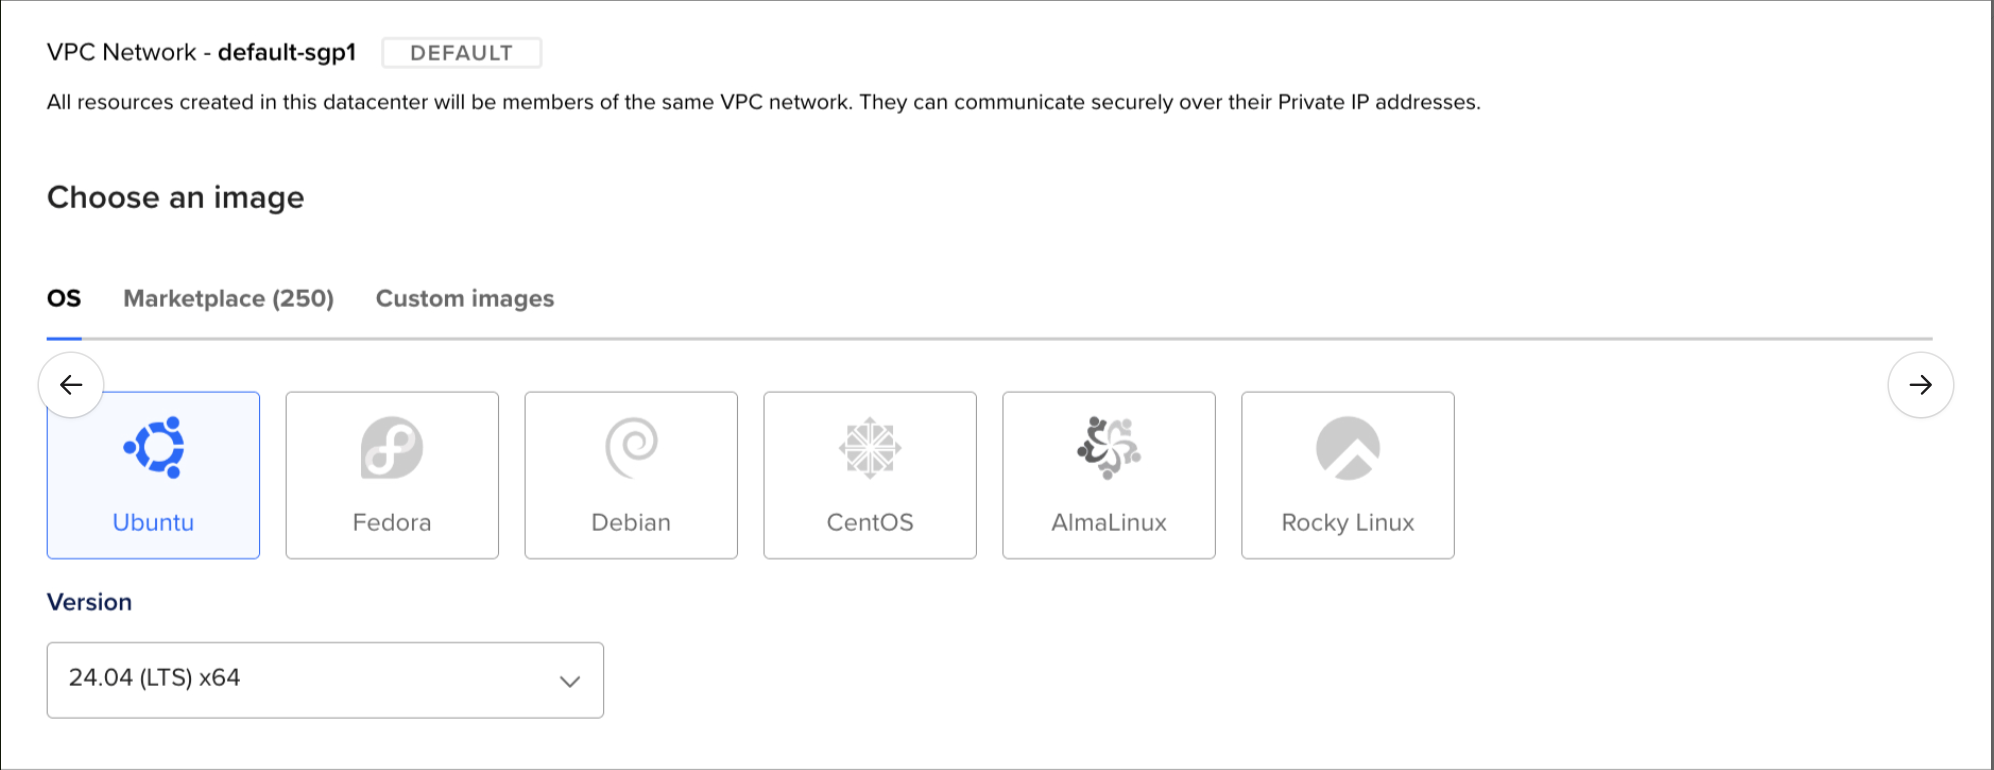
For this guide, we will choose Ubuntu as our OS. It has a mature ecosystem and a vast community, making it easy to find solutions if you run into issues.
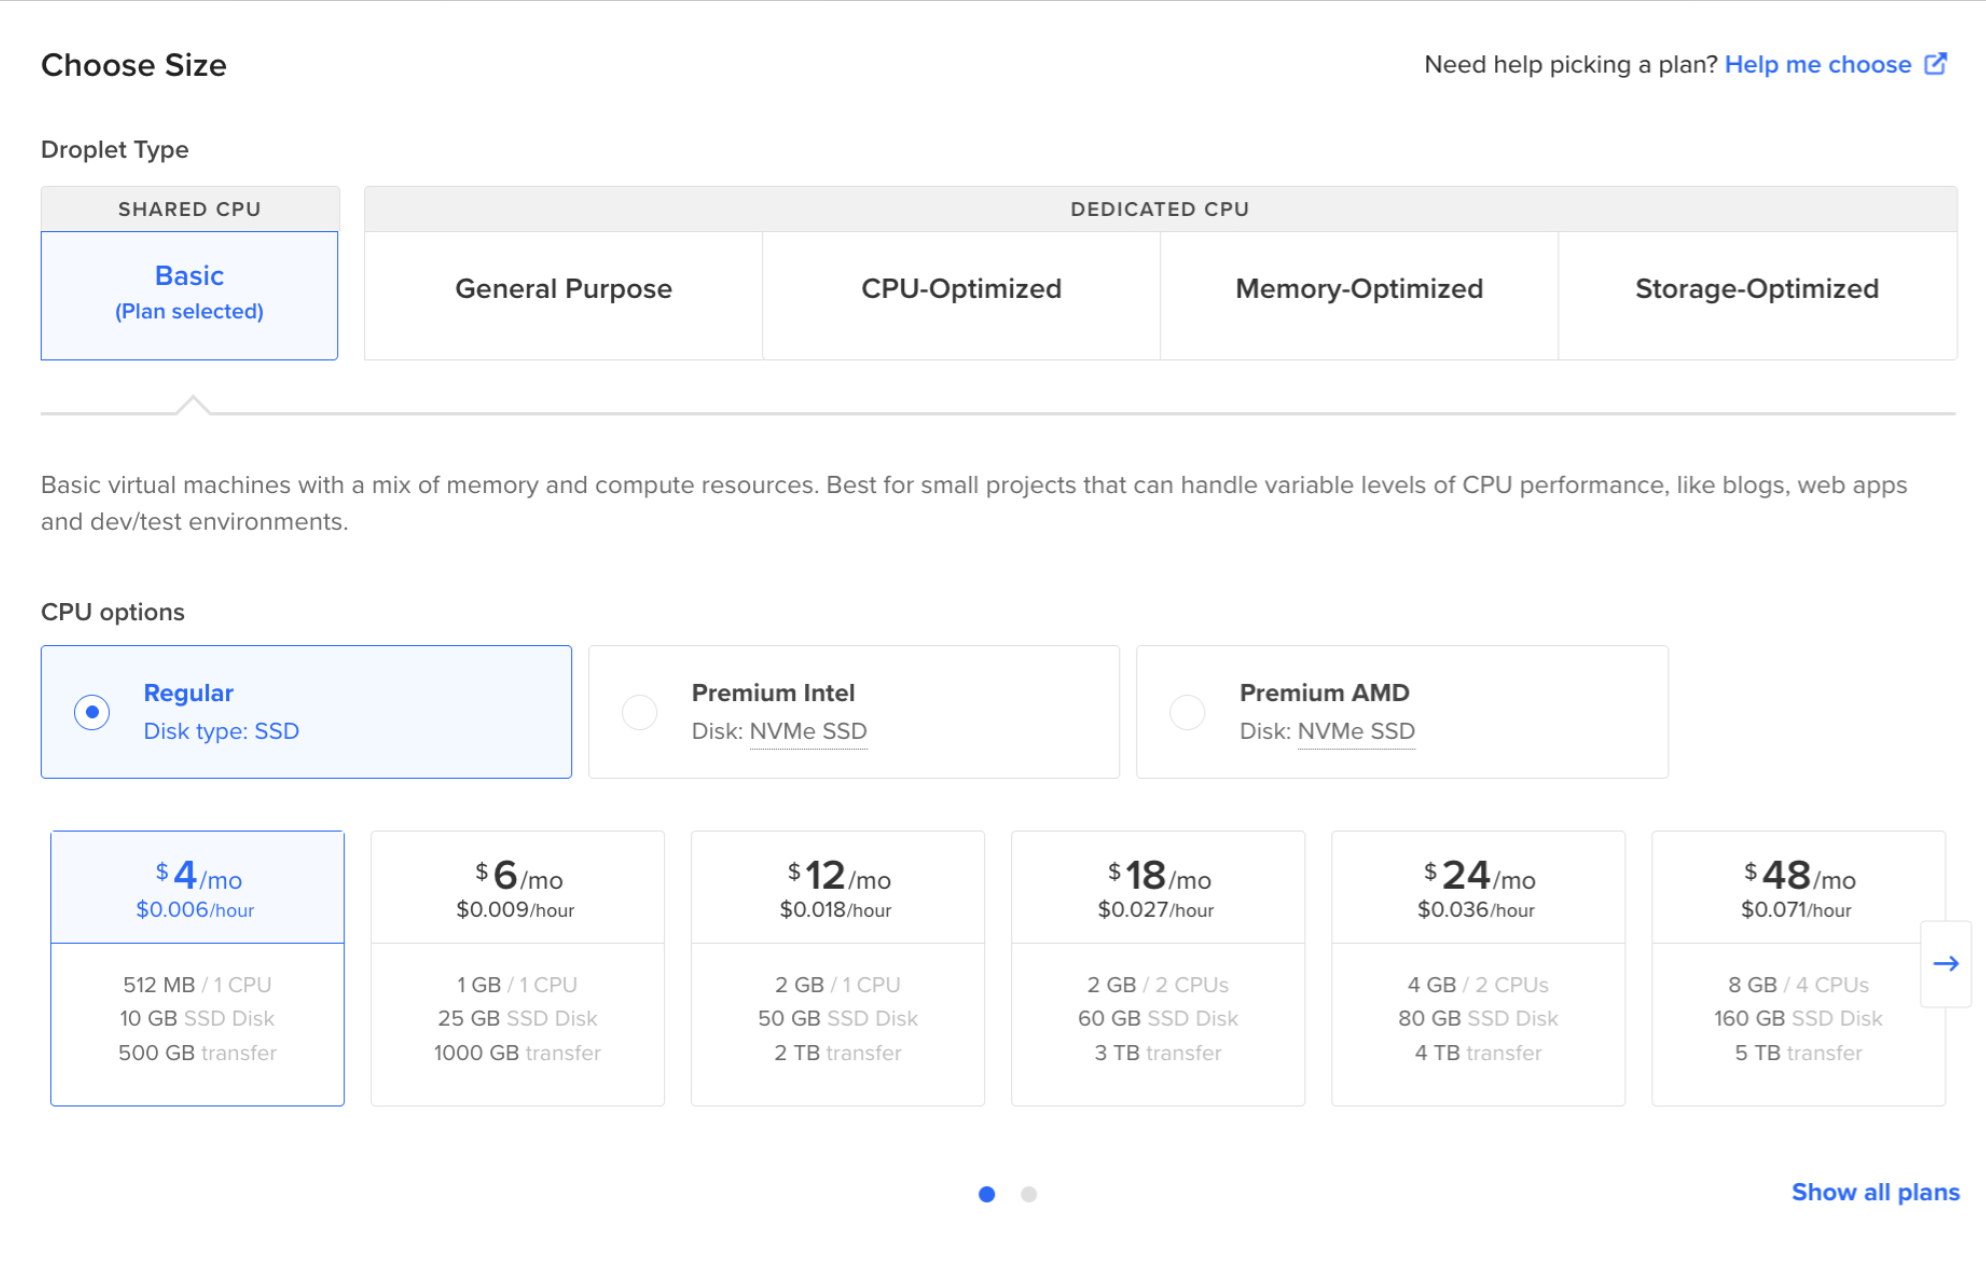
Regarding the size of the VPS, feel free to adjust it based on your site’s expected traffic and resource needs.
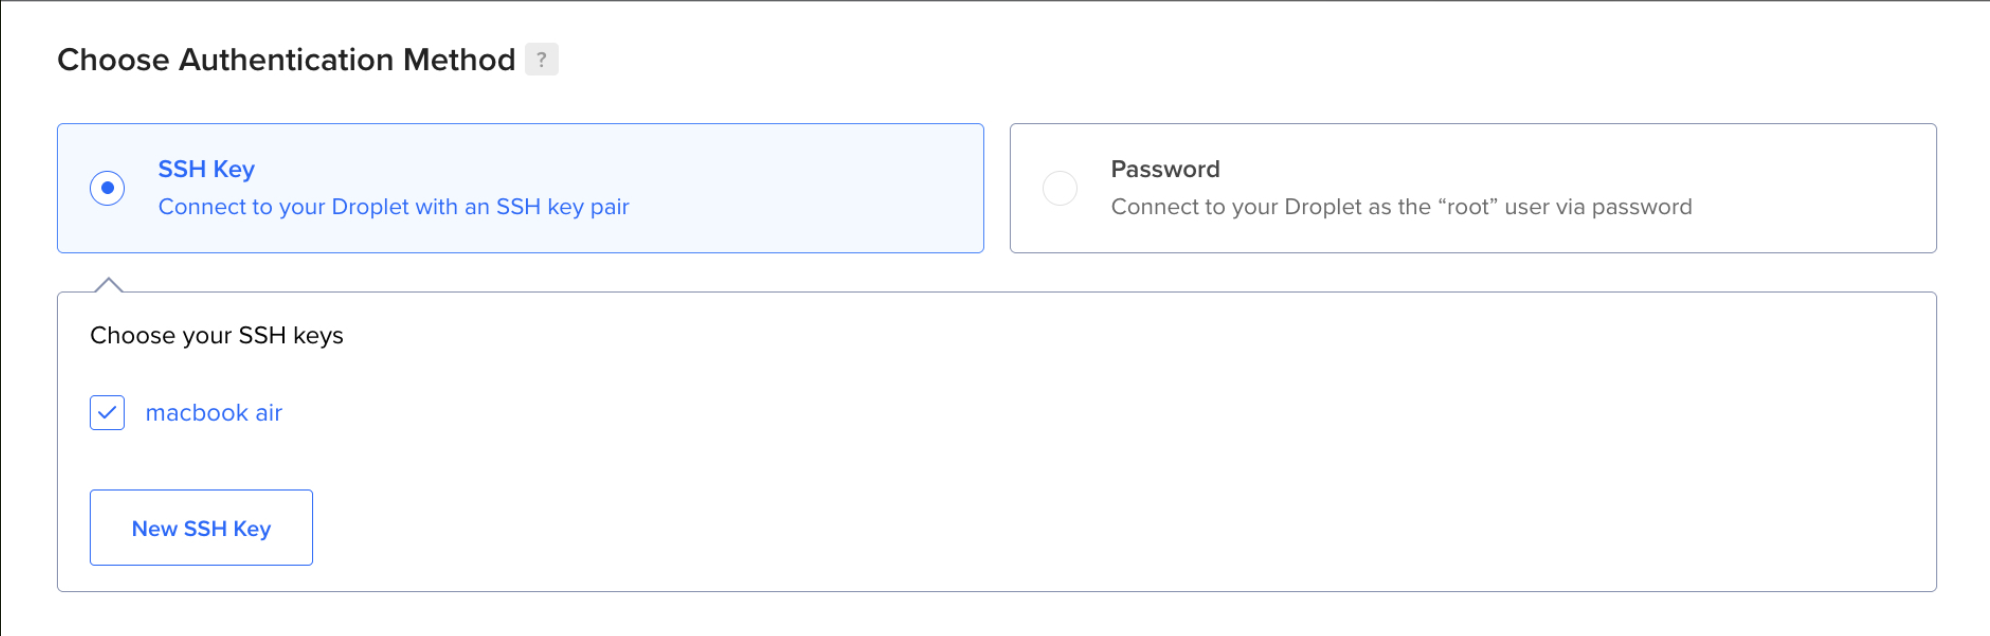
For authentication, using an SSH Key is highly recommended. It is significantly more secure than a password and nearly impossible to brute-force. Generate an SSH key pair on your local machine and provide the public key to your VPS provider to authorize access.
# Create your SSH key
# Use the -t option to specify the encryption algorithm
# Use the -b option to specify the number of bits (key strength)
# Use the -f option to specify the output filename

ssh-keygen -t rsa -b 4096 -f ./do_key

# Once you are done, you will get two new files, do_key and do_key.pub
# do_key is your private key, keep it secret!
# Immediately add "do_key" to your .gitignore.
# do_key.pub is your public key, give this to the VPS
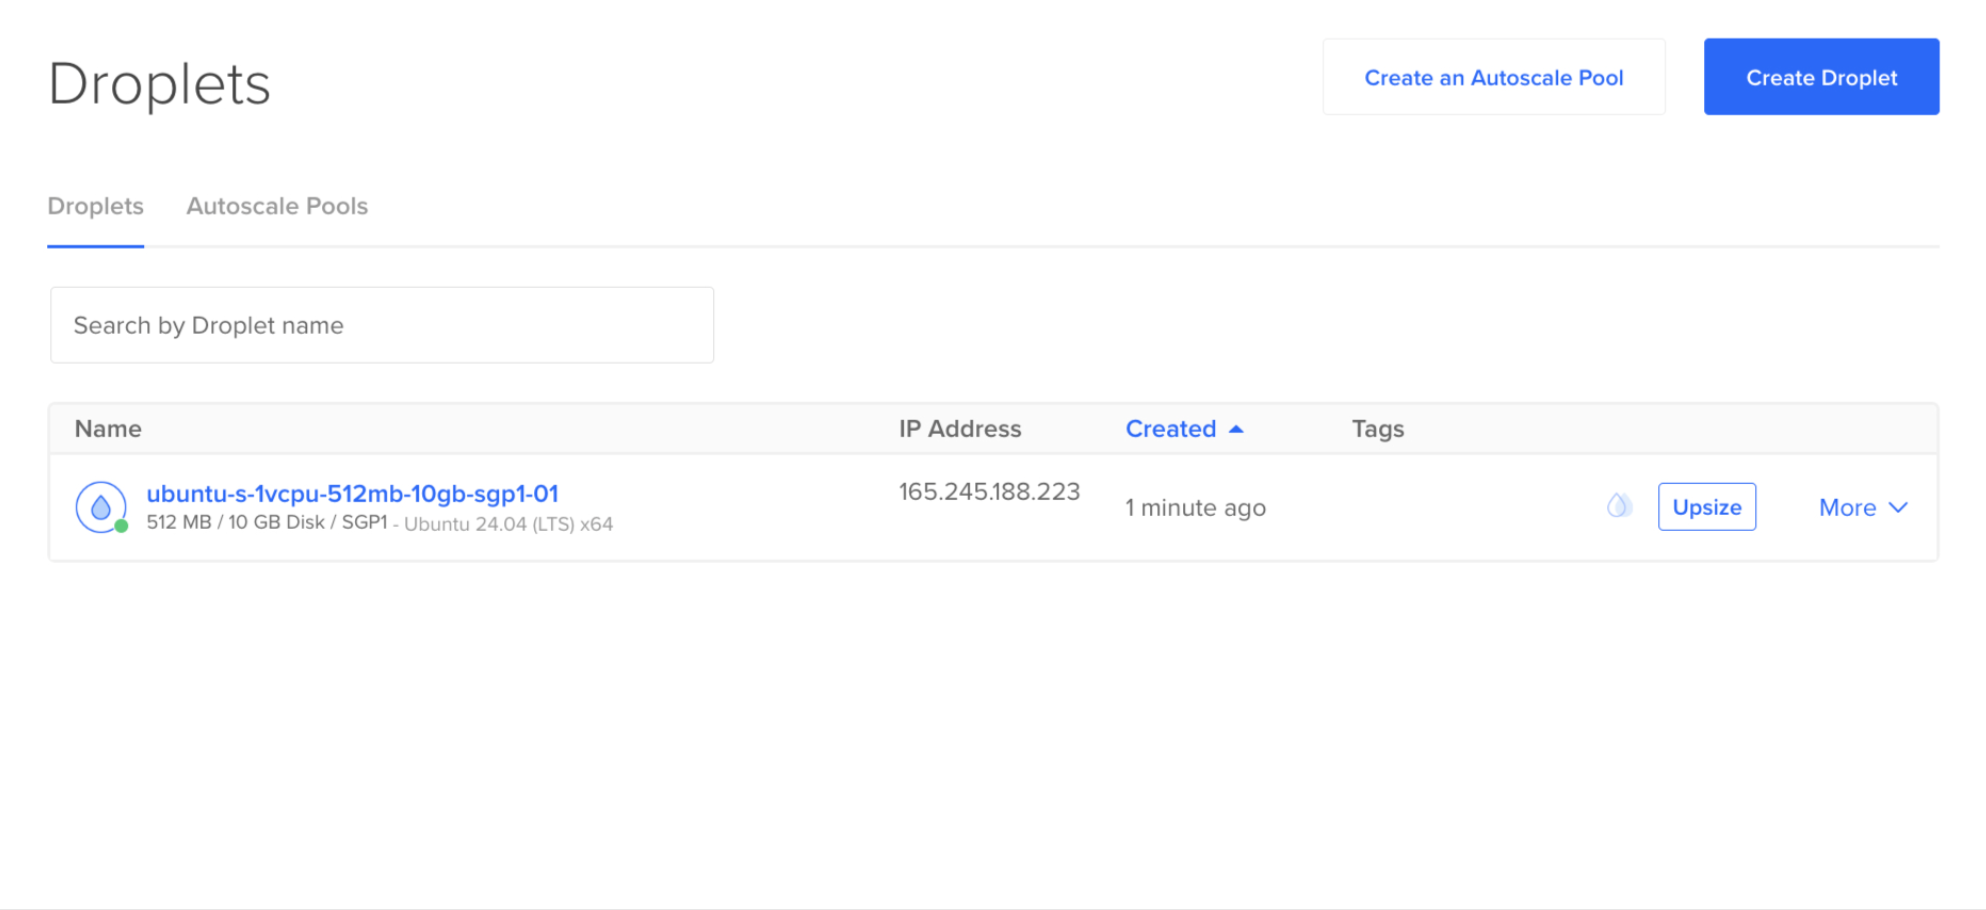
Once the configuration is complete, create your Droplet. You will then see your Droplet’s IP address. We will use this address to access the VPS from our local machine.
Once the VPS instance is provisioned, establish an SSH connection to begin the deployment phase. The workflow consists of three stages: environment configuration (installing the Docker engine), retrieving the latest artifact from the Docker Hub registry, and initializing the container.
# Enter your Virtual Machine from Local through SSH
# Use the -i option to point to your private key file
ssh -i ./do_key root@your_vps_ip

# Install Docker
curl -fsSL https://get.docker.com -o get-docker.sh
sudo sh get-docker.sh

# Pull your container image
docker login
docker pull your-username/my-app:latest

# Stop and remove the old container if it exists
docker stop my-app-container || true
docker rm my-app-container || true

# Run your container image
docker run -d \
    --name my-app-container \
    -p 80:3000 \
    --restart always \
    your-username/my-app:latest
Deploy Pipeline
It would be time-consuming to manually deploy our application every time, so for production size web applications, an automation deploy infrastructure is used to save time and reduce chance of human mistake as it avoids human involvement. It is usually called a pipeline.
What is a pipeline
A pipeline is a software infrastructure that will update your deployed website whenever you make changes. What a pipeline will do is just like what we have achieved a moment before, build the container image, push it into the Docker Hub, pull it back in our VPS, then run our container image. What is different is that we automate it so that we do not need to handle it every time. By automating it, we can also reduce the chance of error as human involvement is reduced.
How does a pipeline work
Just like a normal pipeline connecting a water tank to our bathroom, the code pipeline should connect where we put the code to where we use the code. What’s even better is the pipeline will turn the code into a container image. You can add any other steps in the pipeline as you like, for example testing on the code, or slack notification. But for now, let’s focus on the basic function of the pipeline, update our website whenever changes are made.
Setting up the pipeline
Ensure your project is currently on GitHub, then, create a GitHub action that will run whenever you push any commit to your main branch.
name: Deploy pipeline


# Run whenever you push anything onto the main branch
on:
 push:
   branches:
     - main
With the trigger defined, we now specify the Jobs. Our job build-and-push executes on a GitHub-hosted-runner, a clean virtual environment.
The first two steps are foundational: Checkout and Authentication. We use the actions/checkout action to clone our repository onto the runner. Then, we use the docker/login-action to authenticate with the Docker Hub registry.
# What you want the GitHub action to do
jobs:
 build-and-push:
   # Use the latest Ubuntu runner provided by GitHub
   runs-on: ubuntu-latest
   steps:
     # Step 1: Check out the repository source code
     - name: Checkout code
       uses: actions/checkout@v4


     # Step 2: Authenticate with Docker Hub
     - name: Login to Docker Hub
       uses: docker/login-action@v3
       with:
         # CAUTION: Never hardcode credentials.
         # Use GitHub Secrets to prevent sensitive information leaks.
         username: ${{ secrets.DOCKERHUB_USERNAME }}
         password: ${{ secrets.DOCKERHUB_TOKEN }}
With authentication complete, we move to the core of the process: Artifact Generation. We use the docker/build-push-action to compile the source code into a container image and transmit it to the Docker Hub Registry.
By setting the context to the root directory (.), the runner accesses your Dockerfile to execute the build instructions. Setting push: true automates the upload immediately upon a successful build. This creates a seamless link between your repository and your deployment registry, ensuring that the VPS always has access to the most recent, verified version of your application.
     # Step 3: Build the image and push it to the registry
     - name: Build and push
       uses: docker/build-push-action@v5
       with:
         # Use the root directory as the build context
         context: .
         push: true
         # Tags allow us to version and track images in the registry
         tags: ${{ secrets.DOCKERHUB_USERNAME }}/my-app:latest
The final stage is Remote Execution. We utilize the appleboy/ssh-action to securely access our VPS and automate the exact same deployment commands we executed manually in the previous section. By storing the SSH private key in GitHub Secrets, the pipeline can establish a secure tunnel to our server and perform the update without any manual intervention.
     # Step 4: Execute deployment on remote VPS
     - name: Deploy on VPS
       uses: appleboy/ssh-action@v1.0.3
       with:
         host: ${{ secrets.VPS_IP }}
         username: ${{ secrets.VPS_USERNAME }}
         key: ${{ secrets.VPS_SSH_KEY }}
         script: |
           # 1. Update the local image cache
           docker pull ${{ secrets.DOCKERHUB_USERNAME }}/my-app:latest

           # 2. Stop and remove the old container if it exists
           docker stop my-app-container || true
           docker rm my-app-container || true

           # 3. Deploy the new instance
           docker run -d \
             --name my-app-container \
             -p 80:3000 \
             --restart always \
             ${{ secrets.DOCKERHUB_USERNAME }}/my-app:latest
Once this workflow is committed to your repository, your manual deployment days are over. Every push to the main branch now triggers a structured automation sequence that builds, pushes, and deploys your application in minutes. You can monitor the live execution and logs directly through the GitHub Actions dashboard.
Conclusion
In this guide, we have established the pillars of a modern DevOps workflow: Containerization, VPS Infrastructure, and CI/CD Automation.
This architecture provides a scalable, provider-agnostic foundation for your projects. As your application matures, this pipeline can be extended to include automated test suites, security vulnerability scanning, and real-time team notifications via Slack or Discord. The setup is now complete and ready for production use.